The Singer Le Mans Frame
skip the reading and go right for the pictures
The Le Mans frame was not as good as I hoped but easily repaired. It only had one crack of any consequence and the worst part was that diamond plate that had been welded to the front crossmember, it took me many hours (around 10) to cut out with a dremel tool and many cut-off blades. I did it that way because unlike the other welds on the frame these were really well done, I could not grind them away without damaging the frame member so I cut/ground with a dremel tool. Other than that I had to straighten the frame and reassemble it.
Click on picture to get a larger picture.
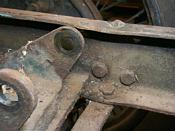
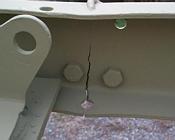
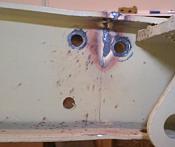
The crack in the frame. Pretty hard to see the crack but trust me its there, it starts at the bottom and goes all the way up. It has a really poor quality looking weld on the outside and a small plate with the 2 bolts holding the plate on, and then the plate is also welded. I will post better pictures after I start getting the frame cleaned up and painted.
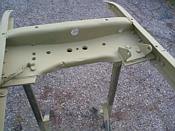
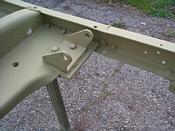
Those darned things sticking up are the front fender supports, some previous owner welded the things on…yikes, whoever owned this car liked his welding torch. Luckily he was a lousy welder and liked to put on a heavy bead with very little penetration.
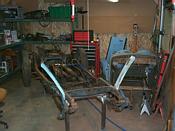
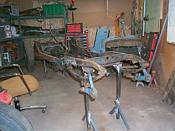
The project as it sat on Jan. 5, 1999. The frame was apart and all I had left to remove was the front leaf springs.
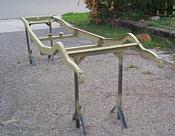
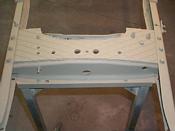
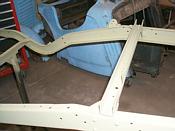
The project on Jan. 30, it took me several weeks to get the sandblasting company to make the time. It kept raining here in S. Cal and they kept getting behind, but I patiently waited and it was worth it to save myself the many hours of sandblasting. I primered the frame with 2 part self-etching primer, kind of a yucky green.
A much better view of the crack in the frame. The 2 bolts are holding the plate on to keep it from spreading and the “bump” on top of the frame is a weld bead that in reality is just sitting on the frame, there was very little to no penetration into the metal.
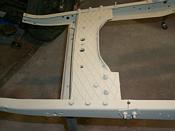
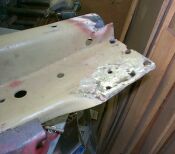
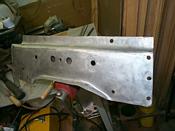
Oh oh…I don’t think diamond plate is original. And its welded much better than the other items that were welded on this car, I think I have to get/make a new crossmember because removing those welds will be next to impossible. And on the far right you can see the crack and part of the plate that was bolted and welded to hold it up.
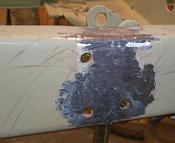
A really good view of the plate that holds the crack together, looks like he welded it (poorly of course) and it cracked again so plated it without even trying to look good. Also a view of the diamond plate.
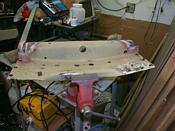
The front cross member, you can see on the left side the diamond plate sticking out and the crossmember welded to it, also at the fronts you can see where it is welded.
Even the steering column bracket is welded to the crossmember. In this pic you can also see where it is welded to the frame at the front, note that putting on the diamond plate raised the crossmember by 1/2″ so they cut out notches on the original crossmember at the upper left side on this picture where it meets the frame, otherwise they could not fit the crossmember back into the car.
Here is the crack with 1/4 of it welded. In this picture I only have welded 1/2 the crack on the other side of the frame, you can see some burn through so I know I am getting a good weld. I stopped here to check alignment, looks good so I continued
The crack all welded up and ground back down, after a coat of primer no one will ever know it was cracked. Except for the few bolts that will be in place, I will be making a plate on the inside that will wedge up against the frame and be held in by 4 or 6 bolts. Just in case my welding is not up to par 🙂. With the plate on the inside of the frame it will be much stronger since the plate will wedge in between the channel and look much better than the way it was.
The crossmember out of the car and diamond plate finally cut off, I think I spent close to 10 hours on it with a dremel tool, this was not welded by the same guy that did all the other welds. Luckily the steering gear was welded by the one who didnt know how to weld. You can also see the cutout in the upper corner that I have to rebuild.
Now that the frame was done and all the problems were patched up, I checked it for being bent and found it was out 1 1/4″ measuring diagonally from front corner to rear corner. Part of the problem was in the front dumbirons being bent in slightly and then the rear section was out quite a bit. I got it all pretty straight and ignored the “kink” visible in this picture. I could not get the frame better than about 3/8″ of an inch, no matter where or how I tried.
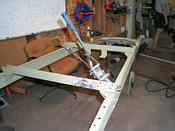
The frame had a slight S curve in it, I could not see it but measuring diagonals from known spots showed the curve. I finally decided to fix that “kink” in the crossbar as can be seen in this picture. The come-along is just there to hold the diagonal as I heat the kink and straighten it. Eureka, that crossmember was slightly bent due to the kink and removing it, straightened out my frame to less than 1/4″ from front to back, by removing the S curve. I would not have believed it but it did.
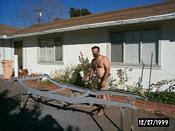
Spraying the primer (I put the date on just to show people on the East Coast how rough our winters are). I used regular “filling” primer that I will also use on the body, it goes on very thick and then sanded smooth most of the rust pocks in the frame, it looked very good, this turned out to be a mistake.The filling primer caused a problem on some bolts for the front crossmember, I tightened them and the next day they were loose, it turned out the primer/paint was so thick that the bolt would work its way into the primer/paint and get loose, I ended up having to remove some thicknesses of primer/paint around bolt holes.
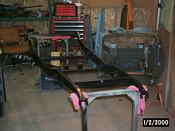
The finished straight frame. Because the frame looks so good, I would do it this way again but I would be more careful about removing some thickness of paint around the bolt holes prior to painting. The filling primer really filled in all the rust pock marks and smoothed out the frame with very little work on my part. I used Chassis Black from Hursts Automotive, really nice paint, seems tough.

